Free Music Lessons
Free Piano Lessons
Basic Rhythmic Notation
Ableton Live
Hooking up your KeyboardIn the most lessons I am using Ableton Live as a tool, which is a powerful music application I strongly recomand.
you can download the application at Ableton website Ableton Live and return to my website later. Read about the different options, version and prices. There is a 30 days or longer free trial, Ableton also offer a discount for students so remember to take this into consideration!.
Follow the instruction from the Ableton's website on how to install and start up the program. When you done, come back to my website and start reading the lesson below.
First look

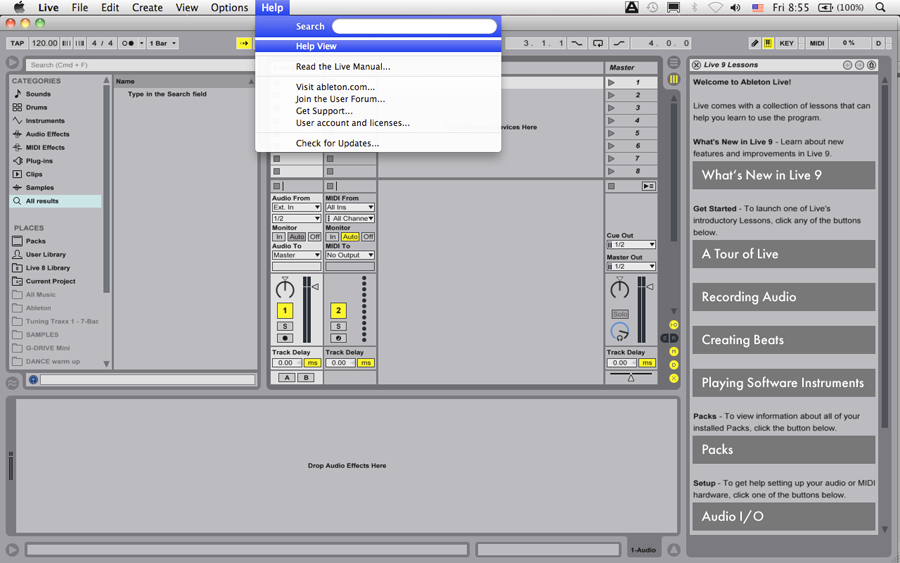
Live comes with a set of interactive lessons (see right column "Live #? Lessons") to take you step
by step through the key features of the program.
If for some reason the Live #? lessons column doesn't show up on the right side of your screen,
go to the help menu and click "Help View" Ex2.
Go through the lessons and if you get stuck, email me here: Ryans Recording describe your problem and I will get back to you with some help, as soon as possible.
Save you work
Use key comand (mac)"shift + comand + S, the "Save Live Set As:" appears!, then navigate to the destination you wish your files to be stored.
Ableton and other DAW is recomanding that you store your audio files and session files, on an external hard drive if you have one. The recommended ones are SSD drives and for HDD drives, you need at least a 7200 rpm drive in order to properly stream data into your DAW.
SSDs are a much better choice than HDD's and SSDs offer significantly better performance and reliability.
If you don't have any of these hard drives, you can create a folder on your local hard drive, sins we are not going to work with heavy audio recording in the beginning and data dosen't take up much space on your internal hard drive.
The basic of working with audio and midi (data) clips, is almost the same.
NOW! create a folder called music lessons and a sub folder called Ableton Live.
Next name the file Live Lessons 9(or a newer version) and click Ok. Your work is now saved and we can move on with the "importing files prosess".
You can Drag and Drop directly from your computer's desktop into Ableton Live, play, edit and export whole complete songs or projects (see "File" - Export).
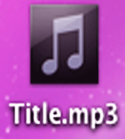
Sound file comes in different formats typically, Wave (with extension_.Wav), AIFF (with extension_.aiff) and MP3 (with extension_.mp3) formats and can all be imported in Ableton Live.
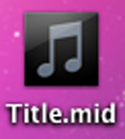
Data can also be imported and in the the format of MIDI (with extension .mid) which can playback your digital piano/Keyboard or the virtual instruments plugins Ableton Live comes with.
Open a new session by pressing "Comand + N (MAC)", to make sure that Ableton's window is the active window.
If you have other programs running you can press "command + Tap" to see which programs is active.
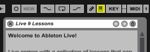
Close the right side column (Live (version #? "Welcomme to Ableton Live") Lessons if open?, clicking the little round ball with the X inside, beside the text in the white field, see Ex:
Resize Ableton Live window by dragging the right bottom corner so you can see the files you want to use,
feind the file on your desktop or where you have stored the sound and midi files.
If you don't have any midi files, you can download some midi clip directly from my website here:
Download MIDI file.
If it dosesnt work!, just email me Ryans Recording and I will send you some.
Drag and Drop the file on to where it says Audio or Midi at the top of the Track or "slot".
Notes your Track count could change depending on how many new tracks you actually dragged into the session see white rectangles wit nunmbers:
1 Audio, 2 MIDI.... in the upper section of the tracks see Ex3.
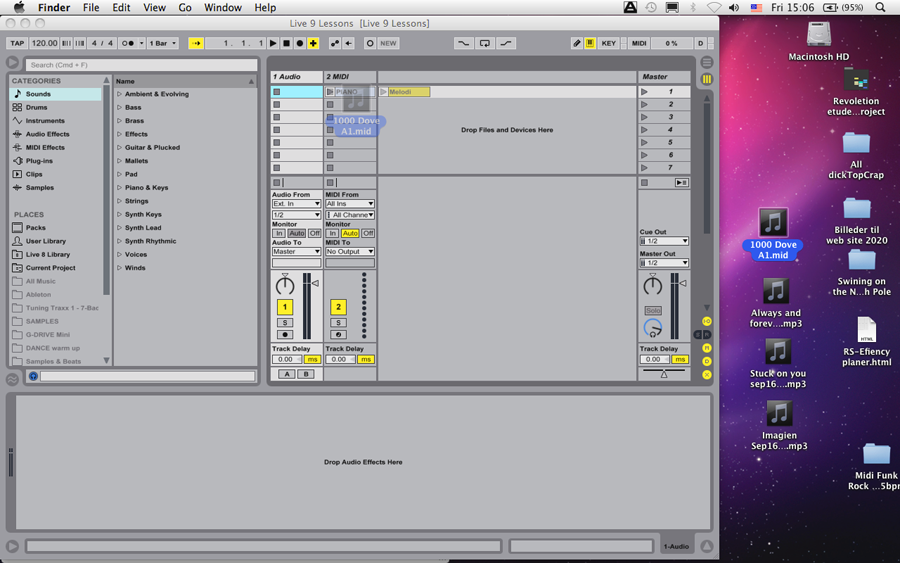
When you are finished dragging and dropping, your Ableton Live Window should look like Ex4, with one or more clips you just imported, see Ex4.
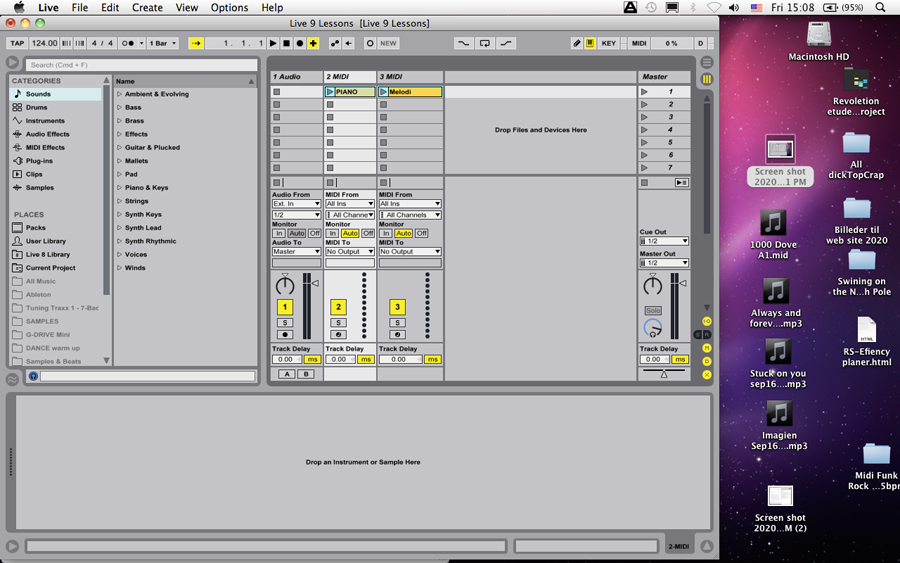
The order of the tracks could change depending on how you dragged the files into the columns(Midi, Audio, Midi ) ect.
Now follow the wihte highlighted line in Ex4 where the clips are loaded in, look all the way to the right side of the window under Master Track.
Click the triangle and the clip should start to Play.You probably don't hear any sound, unless you have loaded a audio clip on to an Audio track.
Press the spacebar to stop the clip from playing, a midi clip needs external sound source like a keyboard or sound module, virtual instrument
to play any sound so your next job will be, to add an instrument to the Midi track.
Loading instruments on to the midi track
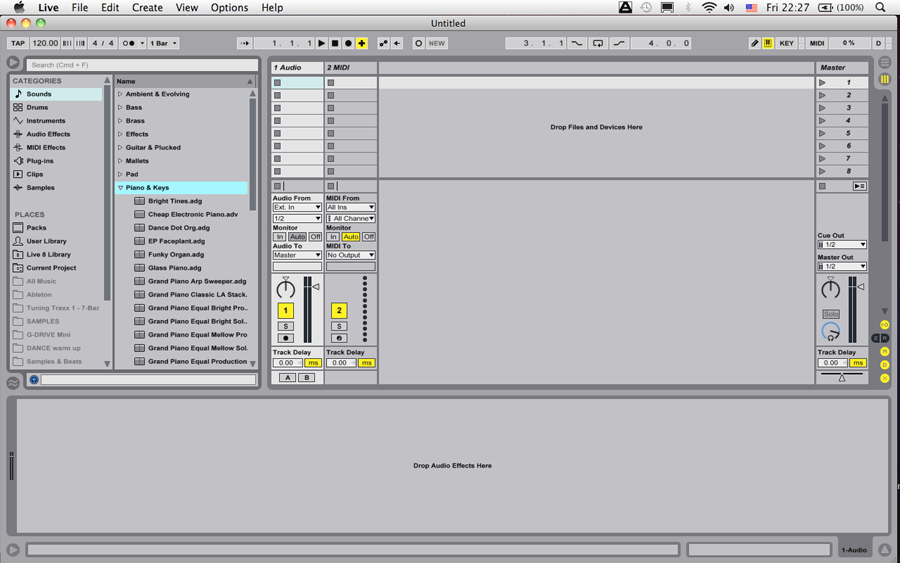
Take a look at Ex4 again and look all the way to the left top corner where is says "categories", underrated is a little musically note "♪" that might be highlighted in aqua blue with the title Sounds.
This window is called the browser, it will take you to a folder on your hard disk where Ableton's files and folders are stored.
Notice the division in the middle and to the right of it, you can see the virtual instruments Ableton comes with, if the little note is highlighted.
In Ex5, you can see the blue Highlighted piano and keys on the right side of the browser,
press the triangle and you can see various of instruments cascading down.
Preview the sounds Piano and Keys click the triangle, then use the up and down arrow on your computer keyboard to scroll through the piano sounds options.
If you don't hear any sound it could be the little tiny headphone on the bottom left side of the browser (it is tiny so look very close and you'll find it ) and it should be dark blue.
If is grey or black it is not active and you cannot hear any sound,
click on it and it should work.
When you have found the sound that you like to use, drag it to the midi track where's the clip you just created is located,
if you have more than one track, do the same procedure for the other tracks.
If you now press the triangle under the master track like you did in the beginning, you should be able to hear the instrument play back with the sound you just selected.
Feel free to drag-and-drop other sounds and stay calm and think a little, if you didn't like what you just did, you can always press Command + Z, to undo the last edit.
The computer keyboard can be used for generating MIDI notes using key strokes.
To turn the computer MIDI keyboard on, use the (PC)CTRL + Shift + K and (Mac)CMD + Shift + K shortcut.
Play the sound by pressing the A = ( Music notation c (do) ), S = d (re), D = e (mi), F = f (fa), G = g (so), H = a (la), J = b (ti), K = c (do).
This is the C Major scale (Do, re, mi...) "all white keys".
W, E, T, Y, U are the grups of 2 and 3 black keys asigend as" W = #c-sharp, E = #d-sharp" and the group of tree's " T = #f-sharp, Y = #g-sharp, U = #a-sharp".
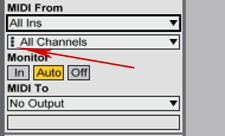
Notice! in the middle of the track where is says "All Channels" a VU-meter lids up with small yellow dots when you press a key.
 If not!, pres the key comand (PC)CTRL + Shift + K and (Mac)CMD + Shift + K shortcut again like befoure and it should work.
If there is no sound it is proberly do to the record button over Track Delay at the bottom of the midi track is not red (On) press it and it should turn red.
If you still don't hear any sound you will need to load an instrument into a column of the track see:
Loading instruments on to the midi track.
If you have a virtual instrument-Plug-in on the track, the Led wil show a sterio VU meter and lids up green when you press a key. If no internal istrument is pressent, you will only see the colum of yellow dots lid up(with record button red!) when you press a the computer keyboards keys (A-L). If using the computers keys to enter notes, some key commands might not work (A-L). Toggle between computer keyboard enter notes or Not!, use the following key commands CTRL + Shift + K (PC) and CMD + Shift + K (Mac).
Hooking up your electric piano, keyboard, synthesizer or MIDI controller.
back to the beginning of Ableton Live tutorial-
USB cable
Many times the manufacturer includes the USB cable with the device, in most cases you just need a regular USB cable like you use for a printer.
pluck the end you used to plug in the printer into the keyboard and the other of course into the computer and Wallah it should work.
Some small MIDI controller comes with their own special USB plug, it looks a lot like the ones you use for phones, don't use your phones USB plug!!! use the one who came with the midi controller and simply plug it in and it should work. Setting up your keyboard with Ableton
Ableton comes with a lot of preloaded Mini drivers but not all. In case you are one of the unlucky ones, you need to set it up manually but don't worry, I will help you setting it up for you.
-
Ableton preference menu
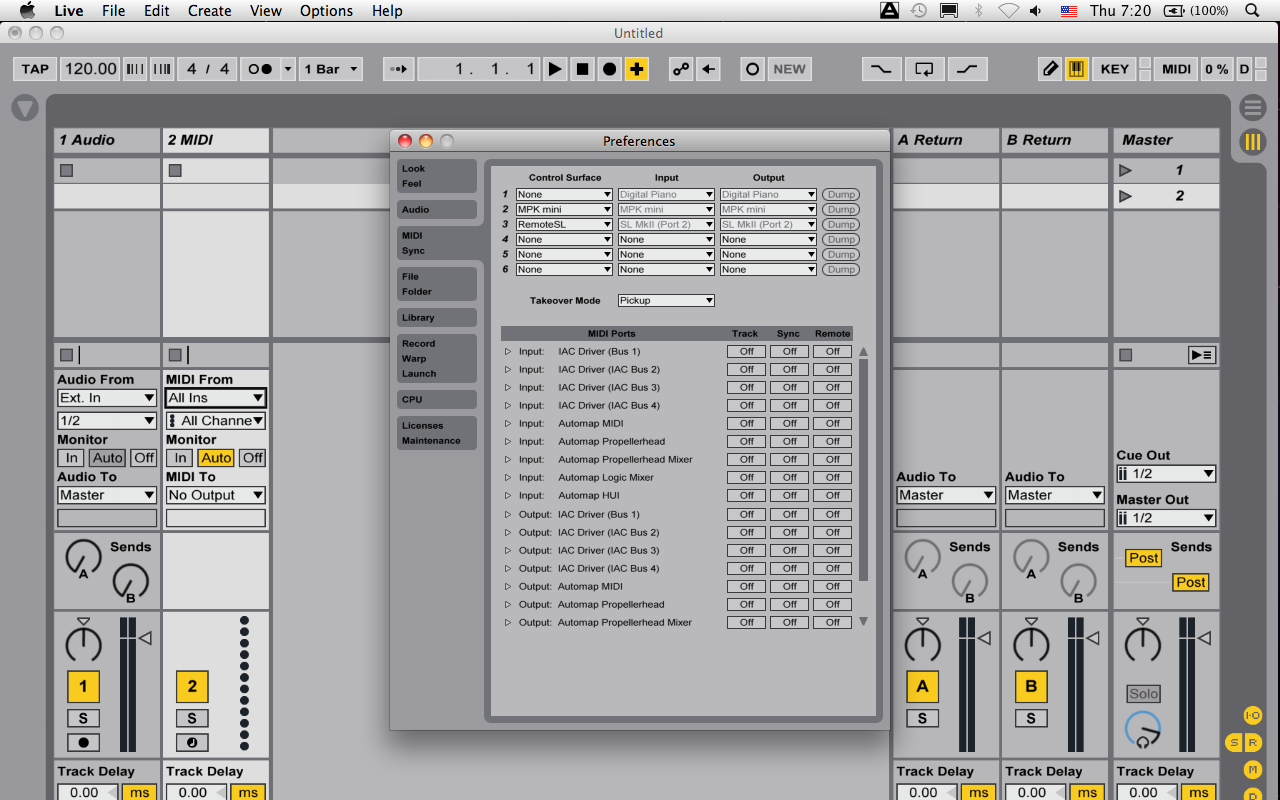
How to get there?, simply press CTRL + ","(PC) or CMD + ","(Mac) this will take you to Ableton preference Pop-Up window it should look almost like Ex6.
In the left column of the preference there is a field you can click on, it says "Midi" and under "Sync", now it should look like Ex6.
I'm using Ableton Live 9 in this tutoria but older or newer versions might look a little different but basically should work the same.
Go to the top of the Pup-Up window where is says:
Control_Surface input output
Right under the input should be a white colum and have a little triangle , it probably says None. Click the triangle and you will see the different devices that Ableton recognizes, your keyboard should appear there with the exact brand name, or the type of instrument for example digital piano, if the proper driver are installed.
If the driver do not appear go to your manufacturer's website and download the newest driver for your device.
Make sure you USB cable is connected to the computers main USB ports and you keyboards USB port.
If you look at Ex6 you can see how my setup input colum looks like.
The instrument names I have connected to Ableton is in light gray color, this is because the instrument are not active but Ableton recognize them and as soon as I connected them, their names will turn black.
Now look down further on the image, you will see Midi Ports and a little under to the left, you will see small triangles with the word input: and a lot of names that might not make much sense to you.
If you have connected your keyboard (USB) you will be able to find that your keyboards name appears on the right side of input: "(ex.)Digital Piano".
Now all you have to do is go under where it says Track and click the square box on the right side with the name of your keyboard an it should turn yellow [On] and now it is connected.
You will only be able to trigger Ableton virtual instruments with your keyboard if the record button is red see the bottom of the column Midi track. If you want to hear your own piano or keyboard play back, you will have to go down to the output: in the same colum as befoure, go further down the list and find your keyboard/Piano and click the [off] squere as before it should turn yellow and say [On].
Now the output is active and your keyboard should playback the Midi you Recorded.
Close the Preferences Window simply press CTRL + "W"(PC) or CMD + "W"(Mac) this will close Ableton preference Pop-Up window.
!Make sure the window is active so you don't close a window you didn't intended to close.
Now go back to your Ableton's Midi track, go to the bottom of the track where it says MIDI From and set it to All Inns.
It is very likely that it already is set correctly. Now go a little lower to where it says MIDI To and "CLICK" to see where you keyboards name pops up,
choose it and you'll all set to go.
Learn Rhythmic Notation
Basic Numbers and Syllables
Counting is a system of regularly occurring sounds that serve to assist you with the performance,
in the score below you can see how notes and the counting is attached to one another.
On page 2 in the Pdf file you will see
Rhythmic Notation and learn how we can vocalize rhythms using the syllables " di , ga " remember
you can always use the video above as a reference.
Free Piano Lessons
Place your Right hand finger 2 and 3 (Ex.B)

on the group of 2 black keys surfaces in the middle of the keyboard.

Next feel the space and the grooves with the 1 and the 4 finger (ex.C) while still keeping finger 2 and 3 on the group of the 2 black keys.
Make sure you far enough in on the 2 black keys so your finger 1 and 4 stops when they stretched out to reach the nabo grups of 3 black keys. You can also feel the groves between the keys on both sides of the group of 2's. Continue until you absolutely sure that there is free space on both sides of the group of the 2 black keys.
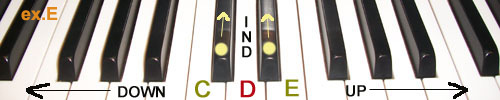
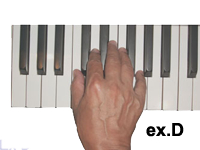
Glide slightly to the right and let each finger fall down, one on each keys as you can see in Ex D below.
Play: C, D, E, E, D, C and say the letters loud as you play.
Now stop looking at your hands!,
Keep your hand possion where it is and look at the notes below.
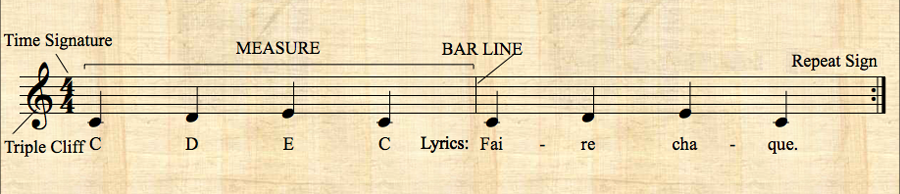 Play and say letters name loud while your are playing them, I'm shur you will reconice the music?,
well it is a very fameus tune "Faire Chaque" so you ear shuld reconice it too.
However som music is easy to lern by lissen to and lern by ear but this is not what we want with this lesson, you should let a friend point to the note you should play ex: (C, E and D) pick them randomly and then you should play the corresponding key. Don't rush, this exorcise is more important then you might think, do this until you are absolutely sure you don't make a mistake, then you will be ready to go on to upcomming free Piano Lessons I will poste later.
Shut me an email and give a feedback here to improve the tutorials thanks.